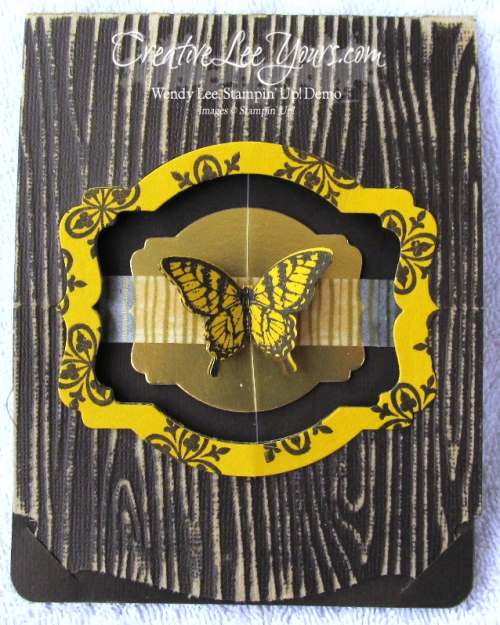
 Today I want to share the fourth card from my Jan FMN class. I had previously posted this card as a sneak peak, but wanted to give you more details in creating the easel.
 I used the pop-n-cuts die to cut out the card base in espresso core’dinations cardstock. I then scored my card base at 5 1/2" and 8 1/4". To create the pop up frame, I lined the center point of the deco labels framelits at the 8 1/4" score line as shown below.
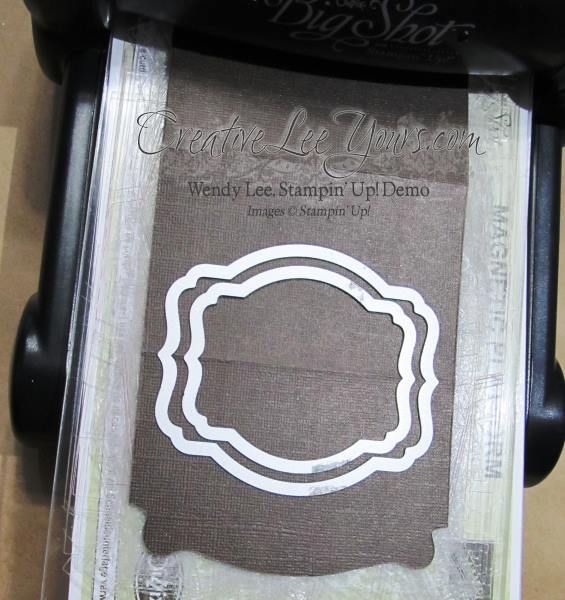 I love how the magnetic platform holds the framelits in place and keeps them from sliding. This is a must have when you are nesting the framelits.
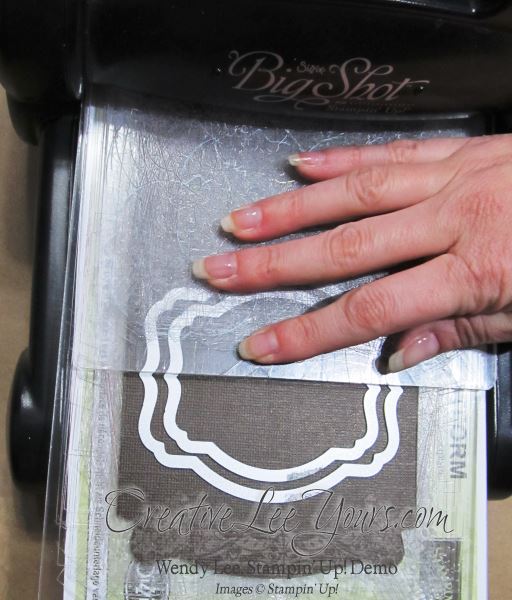 I placed the top cutting pad along the score line and ran it through the big shot so only the top half of the framelits cut through the cardstock.
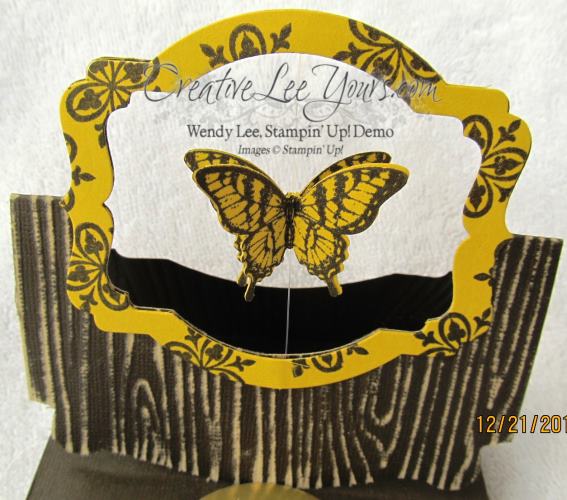
 Remove the larger framelit, keeping the smaller framelit in place. Add the cutting pad so it covers the full framelit and run it back through the big shot. This will cut the window on the card front.
 I embossed the card front with the wood grain folder and then sanded the embossed surface. I love the effect this creates.

 Supplies:
Stamp Sets–Papillion Potpourri, Hello Lovely,
Paper– Gold Foil Paper, Neutrals Collection Core’dinations,Crushed Curry
Ink– Early Espresso
Fabulous Tools Paper Snips, Elegant Butterfly Punch, Paper Piercer, Simply Scored, Stampin’ Sanding Blocks, Core’dinations Dust Buddy, Big Shot, Card Base Pop’n Cuts, Magnetic Platform, Deco Labels Collection Framelits, Wood grain Embossing Folder,
Creative Touch– Dimensional Dots, Mini Glue Dots, Watercolor Wonder Washi Tape, Clear Fishing Line.
Hope you enjoy,
CreativeLee Yours,