I love a fun fold that looks like I spent WAY more time figuring it out than I actually did. And today’s card is exactly that kind of project!
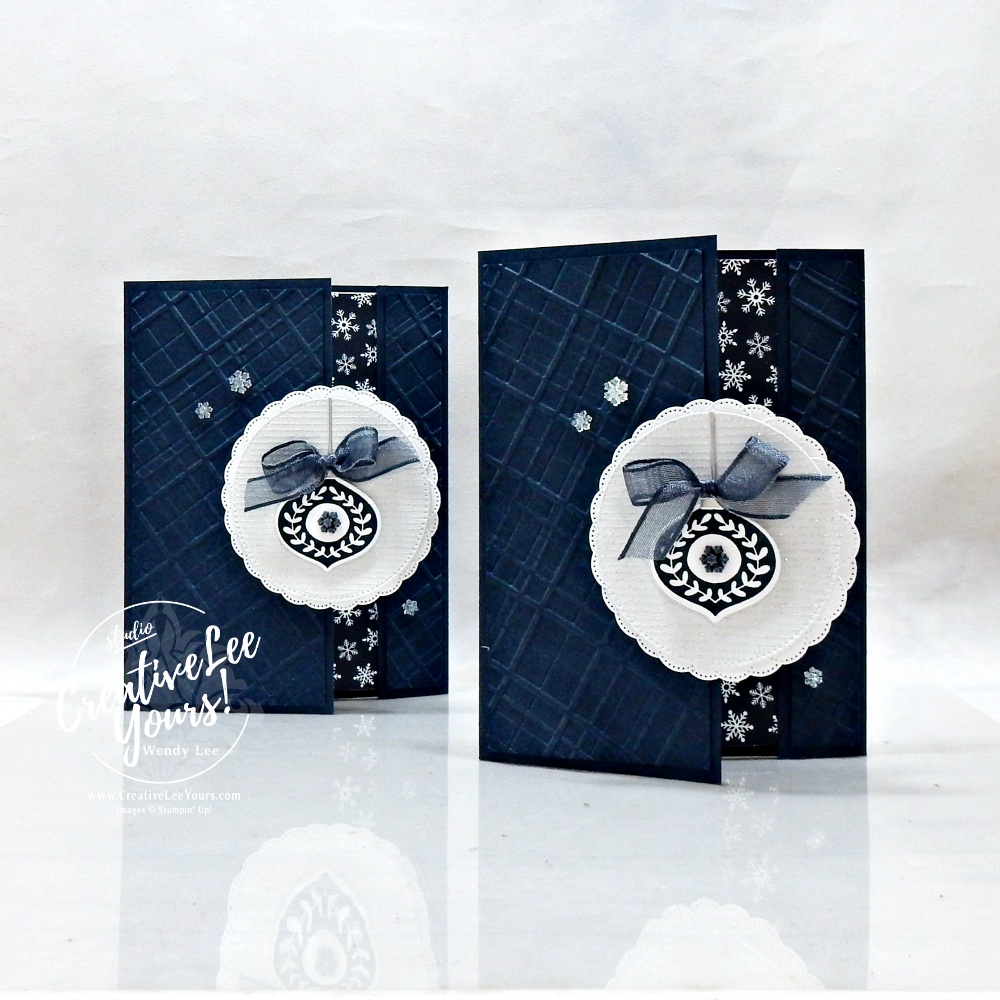
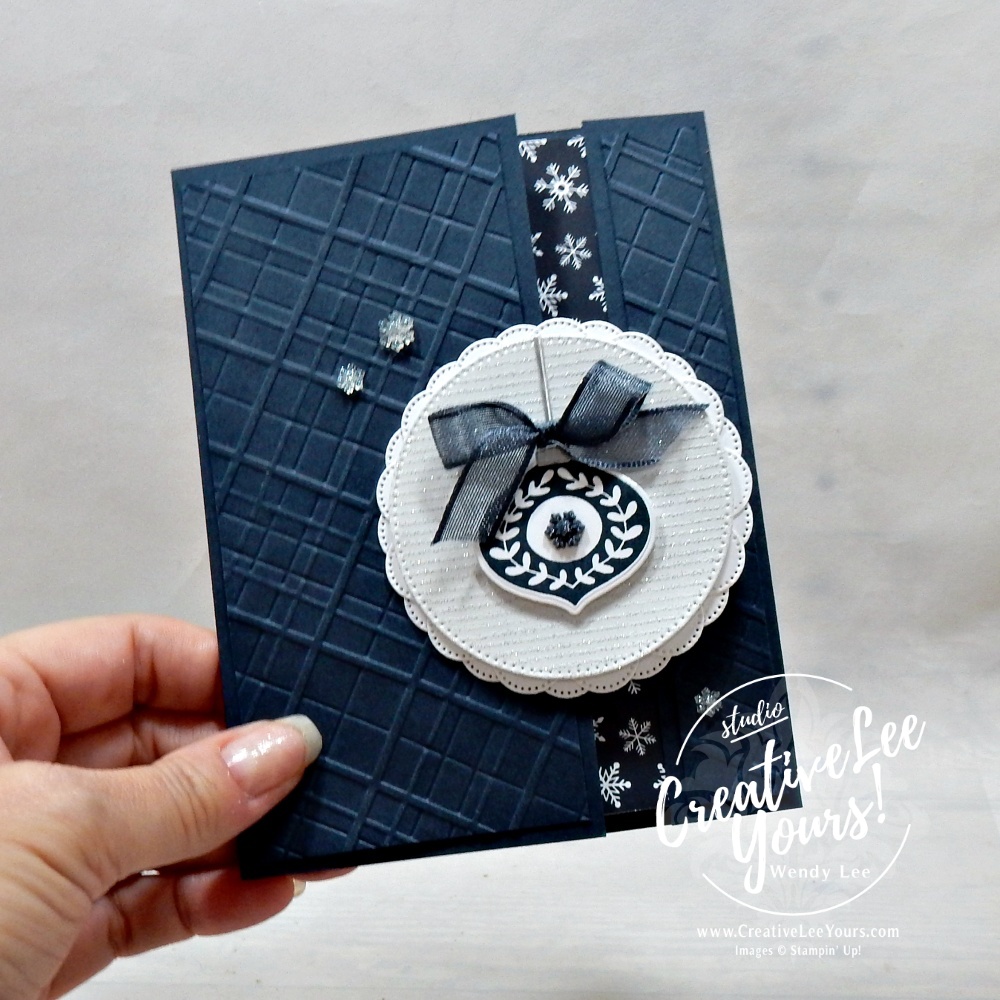
At first glance, it may look like a pretty Christmas card with lots of gorgeous texture and layers…
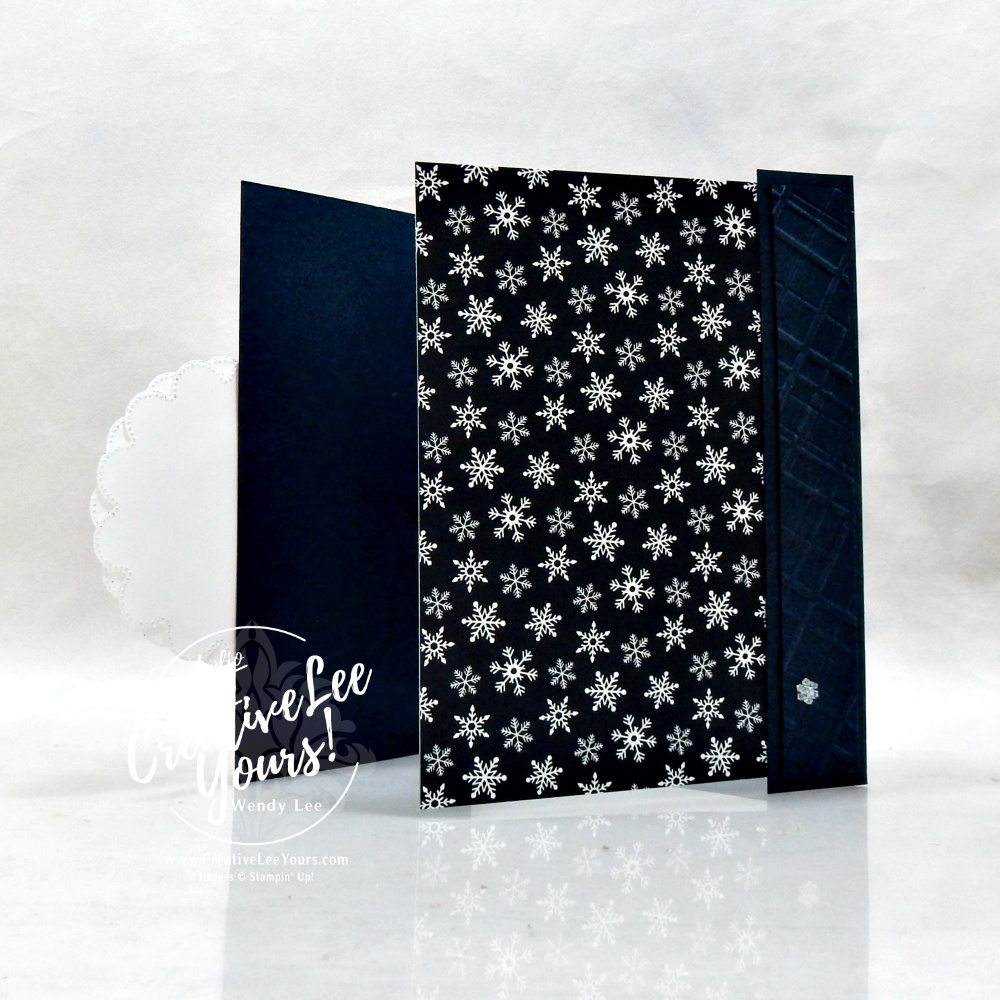
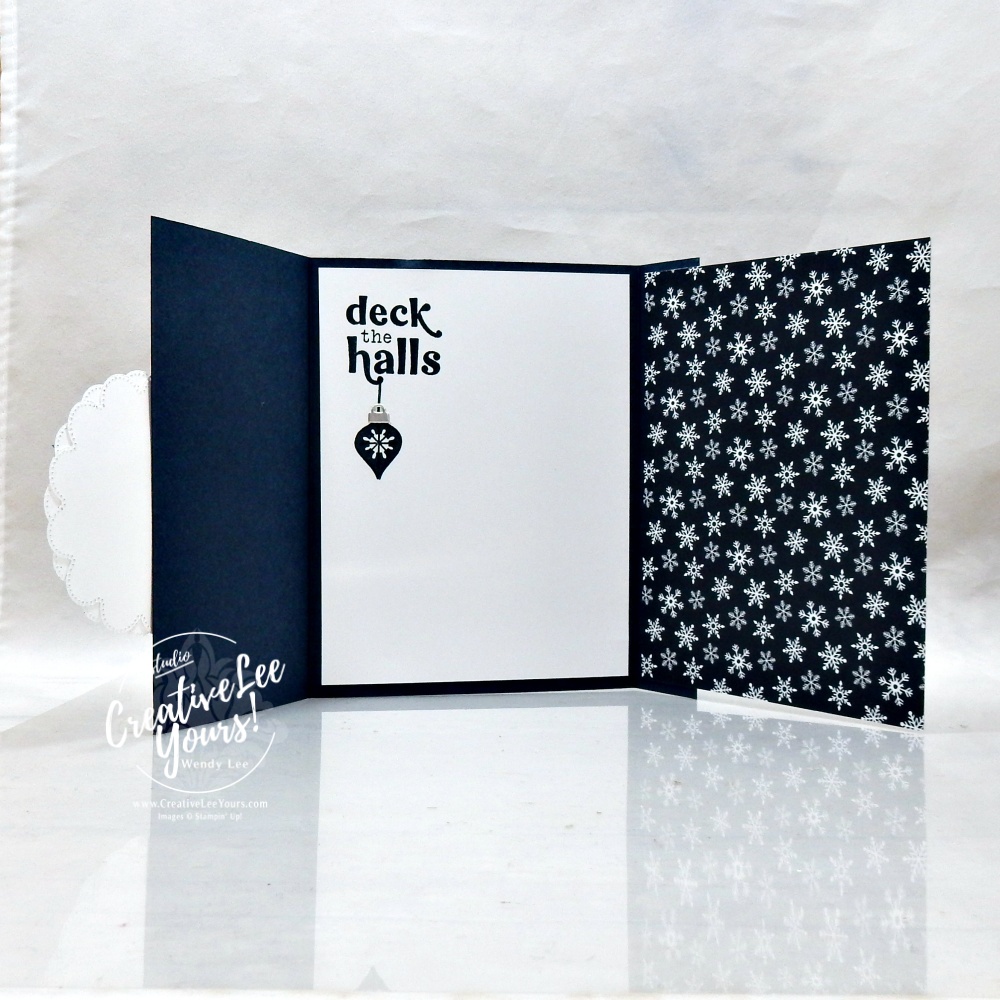
But when you open it, you discover that the card base is intentionally a little shorter, allowing that beautiful patterned paper to become part of both the outside AND inside of the design. And here’s the best part:
This easy Christmas fun fold requires only TWO score lines!
It’s also a fantastic design for showing off your Designer Series Paper (DSP)—and I’ve got a little trick for you if you don’t happen to love both sides of the paper you’re using.
Let’s take a closer look!
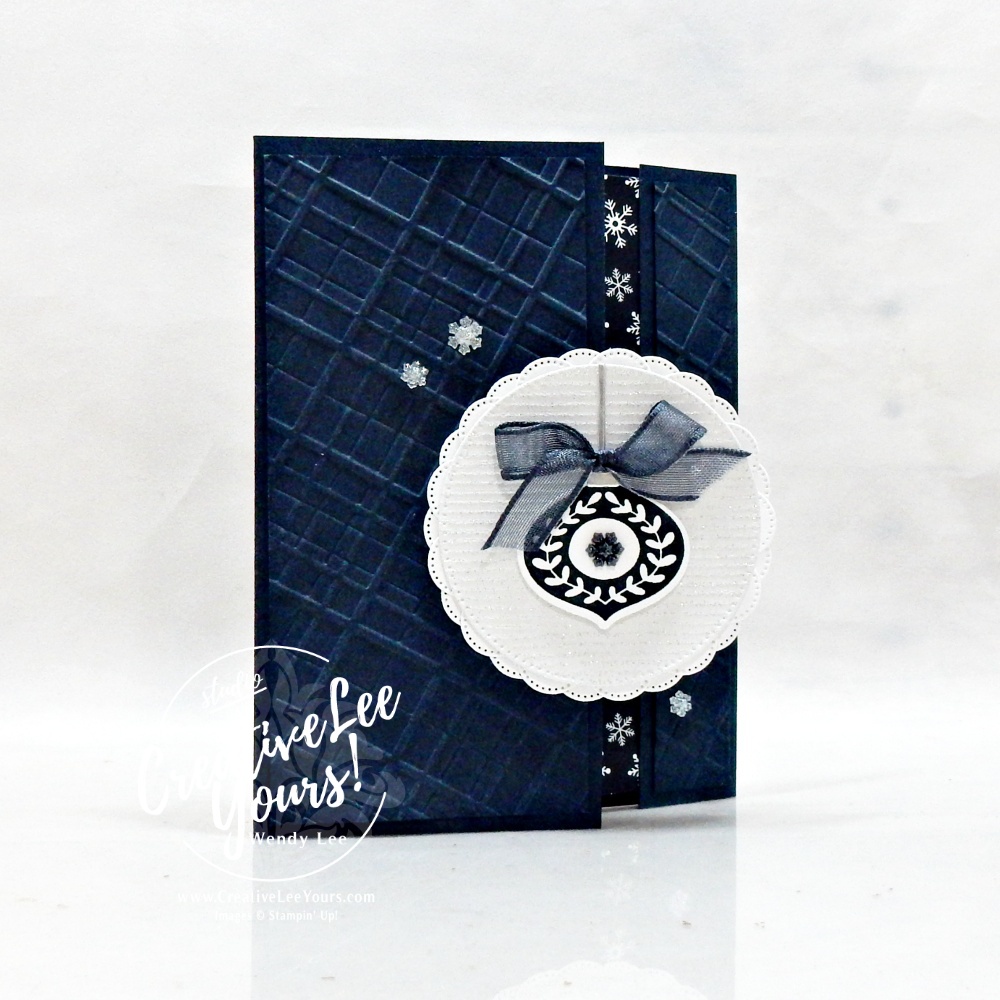
An Easy Fun Fold You’ll Want to Use Again
I’ve actually made another version of this fold recently, and I liked it so much that I said you would probably see me use it again and again. I wasn’t kidding.
The card base starts with a 5-1/2″ x 8″ piece of Secret Sea cardstock, scored at:
- 1″
- 5-1/4″
That’s it!
Those two score lines create the structure of our fun fold.
Because the front portion of the card doesn’t extend all the way across, we get that wonderful opening along the edge where our patterned paper can peek through from inside.
It’s an easy way to make the card feel a little more special without adding complicated cuts, mechanisms or a long list of measurements.
What If You Only Like ONE Side of Your Designer Series Paper?
Here’s one of my favorite things about this fold. It’s designed to let you see both sides of your patterned paper. Normally, that’s fabulous!
But…
What happens when one side of your Designer Series Paper looks perfect with your project and the other one just…doesn’t?
That’s exactly what happened when I chose this pretty snowflake pattern from the A Stitched Season Designer Series Paper. I loved the snowflakes for this card, but the pattern on the reverse wasn’t what I wanted to see when the card was opened.
So I changed the rules!
I used two pieces of Designer Series Paper adhered back-to-back. Now I get the snowflake pattern I wanted on BOTH sides.
That’s your reminder that just because patterned paper is double-sided doesn’t mean your design has to be dictated by what’s printed on the back. If both sides work—fantastic! Let the fold show them off. If they don’t? Make the paper work for YOUR card.
Emboss First…Then Cut!
There’s another little trick happening on the front of this card.
I started with a 3-1/4″ x 5-1/4″ piece of Secret Sea cardstock and embossed the entire piece with the Forever Plaid 3D Embossing Folder.
One thing I really love about this embossing folder is its size. I could place my cardstock in the folder so the plaid runs straight up and down—or rotate my cardstock and completely change the direction of the pattern. For this card, I rotated it so the plaid runs at an angle.
After embossing, I cut a 3/4″ strip from the panel. That leaves me with:
- 2-1/2″ x 5-1/4″ embossed panel
- 3/4″ x 5-1/4″ embossed strip
Those two pieces decorate the separate sections of the card front.
Why emboss first?
Because I’m creating the texture across one larger piece before dividing it. It’s one less little piece to wrestle with inside the embossing folder, and I know both pieces will have the same texture and orientation. Little things like that can make the assembly process so much easier!
Create a Snowy Layered Focal Point
With all that beautiful Secret Sea happening in the background, I wanted the focal point to feel light and almost snowflake-like.
I used two Scalloped Blooms die cuts, layered them together and rotated one slightly so the scallops were offset.
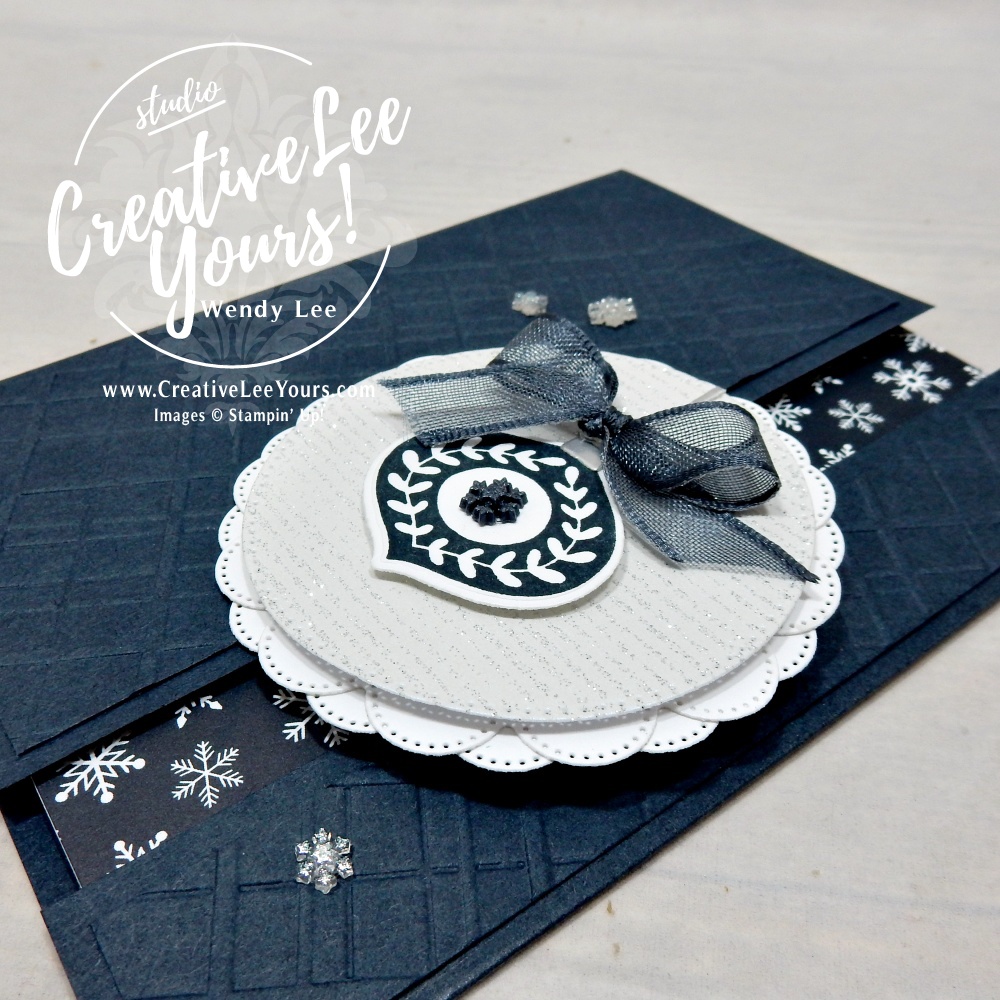
Doesn’t that give it the prettiest little doily—or maybe even snowflake—effect?
I layered that with Shimmering Stripes Specialty Paper, which brings in a subtle silver sparkle.
Then I created the ornament with the Festive Cheer Bundle, stamping in Secret Sea and adding silver foil for the ornament details.
A Secret Sea ribbon bow and those sparkly little snowflake embellishments finish everything off.
It’s almost entirely a Secret Sea, white and silver palette, but all the different textures keep it from feeling flat.
If you’re like many of my crafty friends, you want the picture AND the measurements handy when you’re ready to recreate a project. Here are the measurements for today’s card project Layers (Imperial):
- 5-1/2″ x 8″, scored at 1″ & 5-1/4″ Secret Sea CS
- 3-1/4″ x 5-1/4″ Secret Sea CS for embossing
- (2) 4″ x 5-1/4″ DSP
- 4″ x 5-1/4″ Basic White CS
- (2) 3-1/4″ x 3-1/4″ Basic White CS- die cut
- 3″ x 3″ Shimmering Stripes- die cut
- 2″ x 2″ Basic White CS- die cut
- scrap Silver Foil- die cut
- Approx. 9″ Ribbon
I have created a printable recipe with the complete supply list and cut dimensions for you. Simply click the button below to access the printable file.
Ready to see how this one works?
In today’s video, I’ll show you how to:
- create the fun fold with just two score lines,
- make the Designer Series Paper visible from the front and inside,
- use my back-to-back DSP trick when you only like one side,
- rotate the Forever Plaid embossing pattern for a different look,
- emboss first and cut afterward,
- build the layered ornament focal point,
(note if viewing this post via email subscription, you may need to click the post name to display the video)
Love Easy Fun Folds? Come Create With Me This Weekend!
The timing for today’s project couldn’t be better because we’re heading into World Card Making Day weekend, and I’m one of the teachers at the Stress-Free Card Making Summit!
And guess what I’m teaching?
More fun folds!
I’ll be teaching on Sunday, with two different fun-fold card projects to share. So if today’s card has you thinking, “Okay, Wendy…I could actually do that!”—come join us!
The Summit is packed with creative inspiration throughout the weekend!
Want More Creative Time with Festive Cheer?
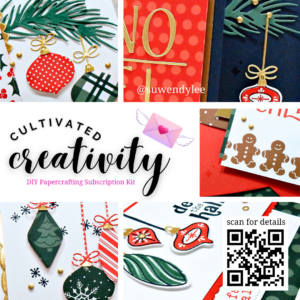
If you spotted the Festive Cheer Bundle on today’s card and thought it looked familiar, there’s a reason. It’s also the featured bundle I’m using for October’s Cultivated Creativity!
If you love making cards but don’t always love all the planning and prep it takes to get started, that’s exactly why I created Cultivated Creativity.
It’s my monthly DIY paper crafting kit where I plan the projects, coordinate the supplies and take care of much of the prep—so you can spend more of your time actually creating.
Each month we’ll create four cards and one notecard, and for October we’re creating with Festive Cheer.
Registration for the October kit is open through October 20, unless it sells out sooner. If you’re not already a member, I’d love to have you join us!
One More Money-Saving Tip…
The Secret Sea ribbon I used on today’s card was on the Last Chance List for just $5.95 when I created this project. If you’re planning to make stacks of Christmas cards, that’s the kind of find that can really help stretch your crafting budget!
Because Last Chance items and pricing can change quickly, be sure to check current availability before planning your projects around it.
Before You Go…
I want to know where you fall on this one:
When you’re using double-sided Designer Series Paper, do you feel like you SHOULD show off both sides?
Or are you perfectly happy covering up a side that doesn’t work for your project? I’m definitely Team “Make the paper work for the card!” Tell me what you do in the comments below.
And if you’re saving today’s project for later, remember: this fold only takes two score lines, so don’t let that fancy-looking opening fool you. This one really is easy!
Hope You Enjoy,
Love this project? Here is your shopping list so you can re-create this idea on your own…just click on the images below to add them to your cart.
Shopping List
![Festive Cheer Bundle (English) [ 168133 ]](https://assets1.tamsnetwork.com/images/EC042017NF/168133s.jpg "Festive Cheer Bundle (English) [ 168133 ]")
![Secret Sea 8 1/2" X 11" Cardstock [ 165624 ]](https://assets1.tamsnetwork.com/images/EC042017NF/165624s.jpg "Secret Sea 8 1/2\" X 11\" Cardstock [ 165624 ]")
![Basic White 8 1/2" X 11" Cardstock [ 166780 ]](https://assets1.tamsnetwork.com/images/EC042017NF/166780s.jpg "Basic White 8 1/2\" X 11\" Cardstock [ 166780 ]")
![A Stitched Season 12" X 12" (30.5 X 30.5 Cm) Designer Series Paper [ 168223 ]](https://assets1.tamsnetwork.com/images/EC042017NF/168223s.jpg "A Stitched Season 12\" X 12\" (30.5 X 30.5 Cm) Designer Series Paper [ 168223 ]")
![Shimmering Stripes 12" X 12" (30.5 X 30.5 Cm) Specialty Paper [ 168197 ]](https://assets1.tamsnetwork.com/images/EC042017NF/168197s.jpg "Shimmering Stripes 12\" X 12\" (30.5 X 30.5 Cm) Specialty Paper [ 168197 ]")
![Silver 12" X 12" (30.5 X 30.5 Cm) Foil Sheets [ 163387 ]](https://assets1.tamsnetwork.com/images/EC042017NF/163387s.jpg "Silver 12\" X 12\" (30.5 X 30.5 Cm) Foil Sheets [ 163387 ]")
![Secret Sea Classic Stampin' Pad [ 165285 ]](https://assets1.tamsnetwork.com/images/EC042017NF/165285s.jpg "Secret Sea Classic Stampin' Pad [ 165285 ]")
![Secret Sea 3/8" (1 Cm) Bordered Open Weave Ribbon [ 166932 ]](https://assets1.tamsnetwork.com/images/EC042017NF/166932s.jpg "Secret Sea 3/8\" (1 Cm) Bordered Open Weave Ribbon [ 166932 ]")
![Adhesive Backed Snowflakes [ 168316 ]](https://assets1.tamsnetwork.com/images/EC042017NF/168316s.jpg "Adhesive Backed Snowflakes [ 168316 ]")
![Stampin' Cut & Emboss Machine [ 149653 ]](https://assets1.tamsnetwork.com/images/EC042017NF/149653s.jpg "Stampin' Cut & Emboss Machine [ 149653 ]")
![Forever Plaid 3 D Embossing Folder [ 164049 ]](https://assets1.tamsnetwork.com/images/EC042017NF/164049s.jpg "Forever Plaid 3 D Embossing Folder [ 164049 ]")
![Scalloped Blooms Dies [ 167646 ]](https://assets1.tamsnetwork.com/images/EC042017NF/167646s.jpg "Scalloped Blooms Dies [ 167646 ]")
![Stylish Shapes Dies [ 159183 ]](https://assets1.tamsnetwork.com/images/EC042017NF/159183s.jpg "Stylish Shapes Dies [ 159183 ]")
![Take Your Pick [ 144107 ]](https://assets1.tamsnetwork.com/images/EC042017NF/144107s.jpg "Take Your Pick [ 144107 ]")
![Simply Scored [ 122334 ]](https://assets1.tamsnetwork.com/images/EC042017NF/122334s.jpg "Simply Scored [ 122334 ]")
![Paper Trimmer [ 152392 ]](https://assets1.tamsnetwork.com/images/EC042017NF/152392s.jpg "Paper Trimmer [ 152392 ]")
![Detail Scissors [ 170902 ]](https://assets1.tamsnetwork.com/images/EC042017NF/170902s.jpg "Detail Scissors [ 170902 ]")
![Bone Folder [ 102300 ]](https://assets1.tamsnetwork.com/images/EC042017NF/102300s.jpg "Bone Folder [ 102300 ]")
![Stampin' Seal [ 152813 ]](https://assets1.tamsnetwork.com/images/EC042017NF/152813s.jpg "Stampin' Seal [ 152813 ]")
![Mini Glue Dots [ 103683 ]](https://assets1.tamsnetwork.com/images/EC042017NF/103683s.jpg "Mini Glue Dots [ 103683 ]")
![Adhesive Sheets [ 152334 ]](https://assets1.tamsnetwork.com/images/EC042017NF/152334s.jpg "Adhesive Sheets [ 152334 ]")
![Multipurpose Liquid Glue [ 110755 ]](https://assets1.tamsnetwork.com/images/EC042017NF/110755s.jpg "Multipurpose Liquid Glue [ 110755 ]")
![Stampin' Dimensionals [ 104430 ]](https://assets1.tamsnetwork.com/images/EC042017NF/104430s.jpg "Stampin' Dimensionals [ 104430 ]")
This post may contain affiliate links. This means I may earn a small commission at no additional cost to you if you click through and make a purchase.
Live in the US…CLICK HERE to shop my online store and have your Stampin’ Up! supplies shipped straight to your door!
Don’t forget: Orders of $20 or more now earn 10% back in Stampin’ Rewards—just make sure you’re logged into your account and have opted into the rewards program at checkout. Stampin’ Up! tracks your rewards for you!
Need some assistance placing your order? No problem!
Call/text me at 336-671-1959 or send me a message on Facebook. I am happy to help.

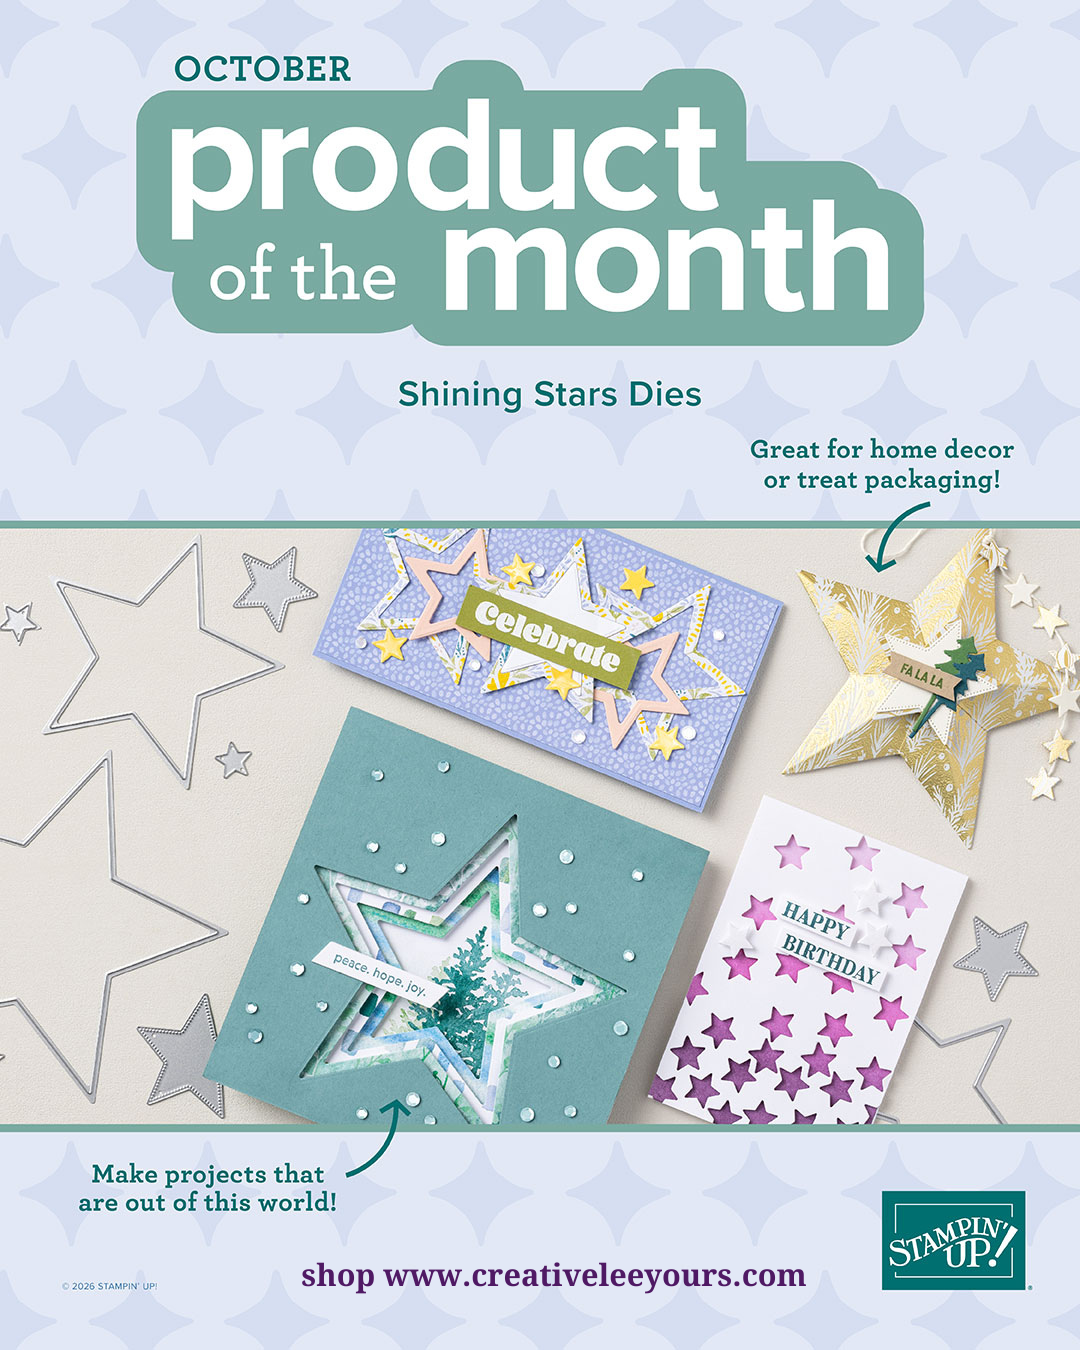
Grab This Month’s $5 Product of the Month!
Want a fun bonus with your order? When you spend $75+, Stampin’ Up! lets you add this month’s Product of the Month for just $5 — and it’s an item you can’t get anywhere else!
It’s limited, exclusive, and the perfect little extra to treat yourself while you craft.
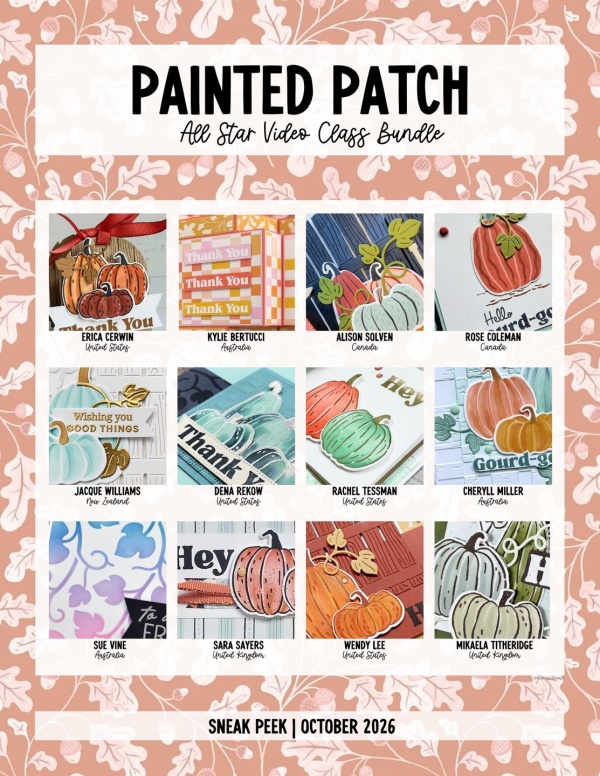
Want to earn EXCLUSIVE video tutorials once a month featuring the latest Stampin’ Up! product suites? Each month you will receive 12 tutorials all bundled together when you place a qualifying $50 or more order with me through my online store for FREE!
You may also purchase individual tutorials HERE.
More Than a Discount… Join the Diemonds!
Have you ever thought about becoming a Stampin’ Up! demonstrator?
Whether you’re looking to save on the products you already love, be the first to see new releases, or simply become part of a welcoming creative community, becoming a Diemond might be exactly what you’re looking for.
- Shop at a discount
- Early access to new products
- Exclusive demonstrator resources
- A supportive community that encourages you every step of the way
Whether you’re a hobby stamper or dreaming of building a business, there’s a place for you here.
Join the Diemonds and enjoy the benefits of being part of the Stampin’ Up! family. Discover what it’s really like to be part of the Diemonds.
Questions? I’d love to help! wendy@creativeleeyours.com
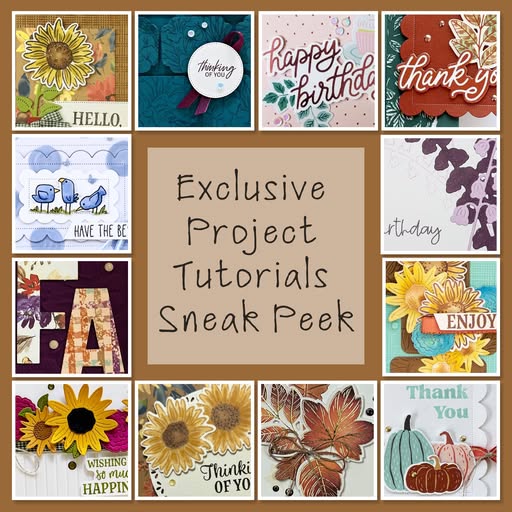
12 EXCLUSIVE tutorials each month for FREE!
I am offering the monthly Exclusive Project Tutorials FREE to my email subscribers. Yes! The Exclusive Projects team is comprised of a talented group of Stampin’ Up! demonstrators sharing great ideas. There will be a wide variety of projects featuring multiple stamp sets each month that you will get for FREE…if you are a subscriber to my newsletter… Whoo Hoo!
Not yet a subscriber? Sign up HERE
What others’ are saying about the Exclusive Tutorial Bundles:
Thank you! Each and every one of your cards are wonderful! I love having the tutorials printed out. I flip through the pages and always find something that would be fun to make! Thanks again!
-Mary D
*****
“Thank you so much – I always enjoy the fresh design options – you make card making fun again.”
-Kathleen L
*****
“I LOVE and appreciate this special offer you give to your email subscribers. I always find lots of inspiration from the demonstrators and enjoy replicating their beautiful designs.”
-TY Barbara D
CreativeLee Yours,

OTHER IMPORTANT LINKS AND INFORMATION:
- Join my Stampin’ Up!® Diemonds team and get the awesome customizable starter kit HERE. It’s the best bundle ever!
- Ready for a fun, monthly craft kit delivered directly to you, so you get all the joy of creating without having to do all the research, design and prep? Cultivated Creativity is for you! Click HERE to get started.
- Join my Online Forget Me Not (FMN) Card Club and elevate your hand made cards HERE.
- Keep up to date with all my upcoming events by JOINING MY 📧 EMAIL LIST. You receive a FREE PDF tutorial when you subscribe as my gift HERE.
- Join Paper Pumpkin and get FREE PDF Tutorials with alternate projects each month.
- Shop my Tutorials to spark your creativity as I guide you through creating beautiful projects HERE.
- Earn Exclusive BONUS tutorials with my rewards program. CLICK HERE for details.